

After that I had to make up patterns myself. Next up was the squirrel. I enlarged a print out of the actual decal to get the body and tail shapes. He didn't look right being a side view so I added paws on the right to balance him out. Simple french knots for eyes and a tiny brown circle for a nose made his face. I lengthened the tail to attach it to his back side and again added a little pointed oval to allow for some stuffing.

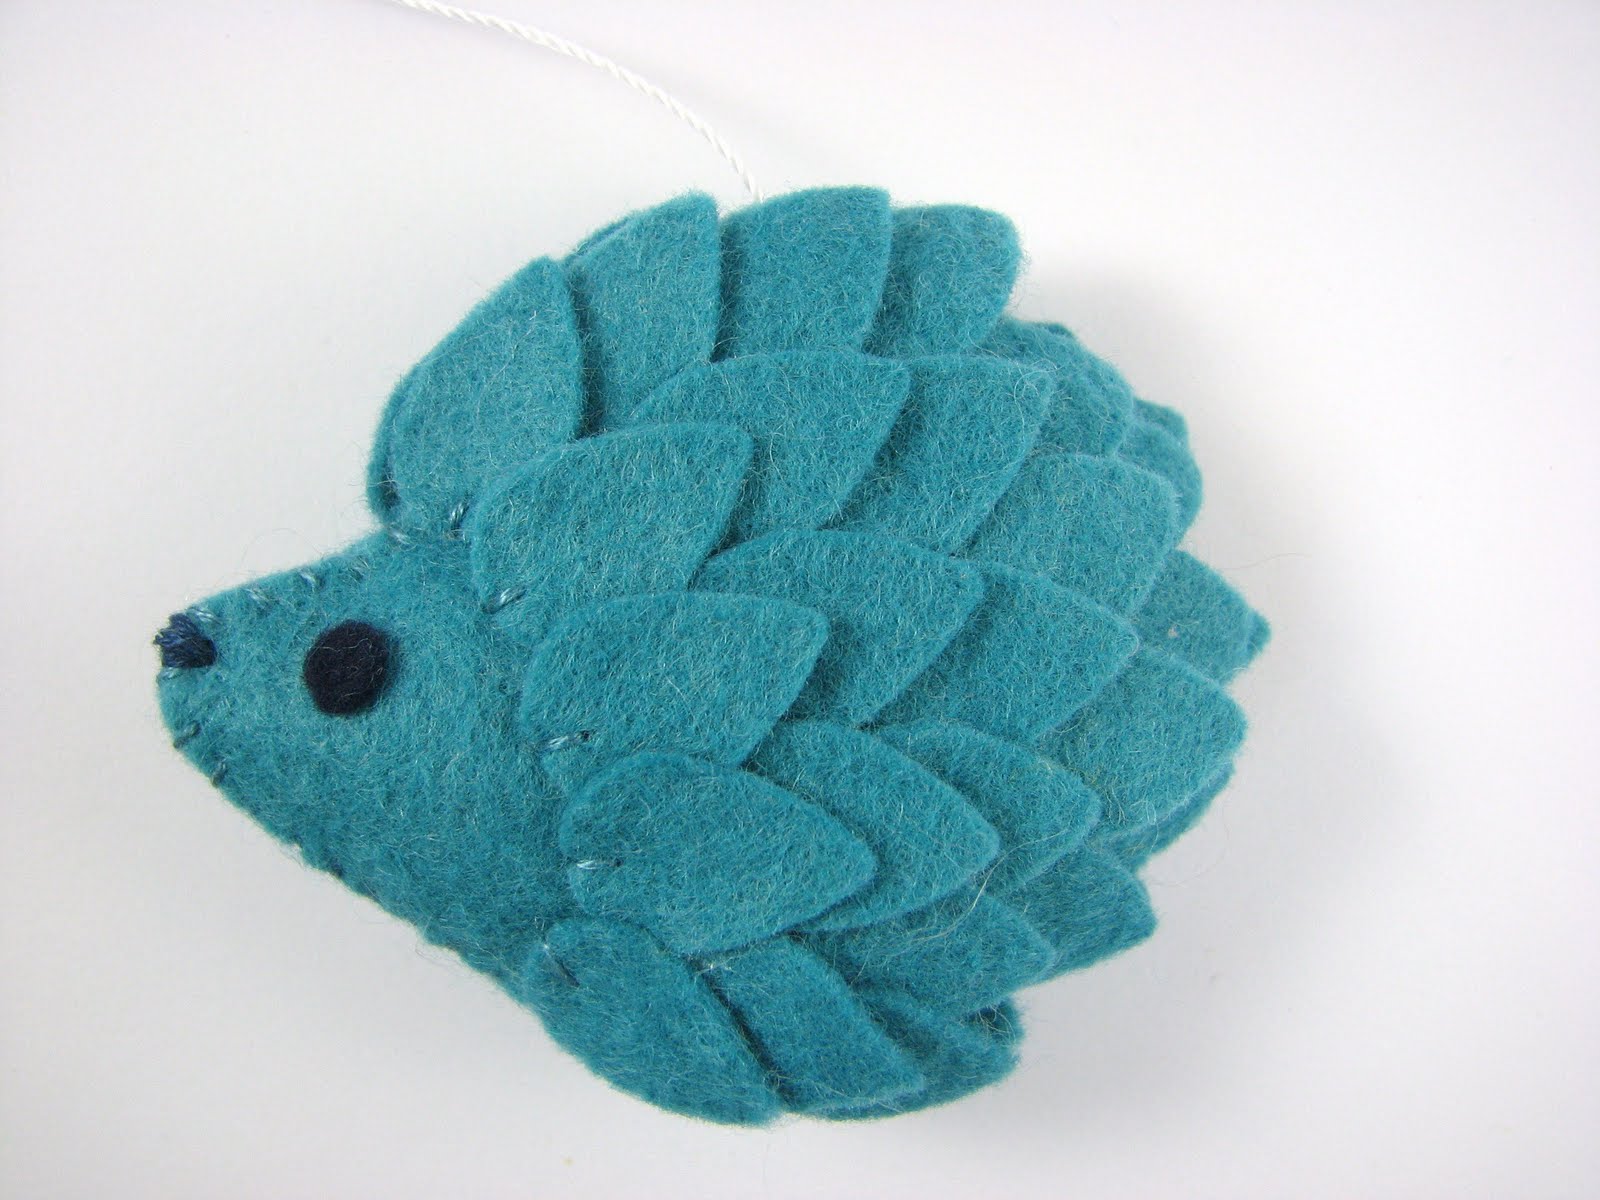
The hedgehog may be my favorite - he was created from a simple body shape and a lot of little die cut leaf shapes. I sewed the 'leaves' by his face then glued rows along the rest of his body. I sewed his sides together, added stuffing, eyes and a little nose and a hedgehog was born!
Hmmm, maybe the owl is my favorite? This guy was made with the basic shape from the decal, a lighter colored tummy sewn on and then the face, feet and wing shapes glued on. I've really never been a 'gluer' with my felt, but I tried stitching around the small pieces and it just looked messy.

I thought I needed an odd number for the mobile balance so had to decide on critter #5. I tried a bunny but the scale was off with the ears on a like sized body. I settled on a butterfly when I realized I should be thinking in terms of what color would mix well. That lead to green as a nice balancer and of course...a froggie! I found a basic shape online that I modified to better match the existing fellas. Again I sewed on the belly, added the back and a little oval for stuffing room. I always added the faces last since the change in dimension after stuff would have moved the positioning.

Now that the forest friends were complete it was time to figure out how the heck to make them into a mobile! I purchased pink plastic embroidery hoops in 8 in and 6 in sizes but later decided a natural wood would look better and more like the tree in the decal. I spent quite a while trying to determine the best balance of colors and critters until I settled on four hanging around the circle and one in the center. Each of the animal had a flower for balance as well...

I measured the four cross points of each hoop and drilled 1/8 holes at each point. I then painted the hoops brown (3 coats) and added a coat of Mod Podge for a more finished look. The owl and bird were above their flowers (to put them in the 'sky') so I sewed the flower onto white jewelry string then using a large upholstery needle I threaded on the animal. I looped the string through a hole in the larger hoop, then looped it through the smaller and left lots of extra in case I needed it! Similarly, for the frog and squirrel I threaded the animals then sewed on the flower shape and threaded through the hoops. Once everyone was in place I adjusted the heights so it all hung straight and balanced. To finish it off, I added little leaves to cover the strings on the larger (bottom) hoop and tiny flowers to cover the strings on the smaller (top) hoop. The hedgehog got center stage with just a long string gathered into the other four at the top. I tied all the strings to a D-ring and covered it with one final felt flower. A ribbon looped onto the D-ring for hanging and ta-da...custom baby mobile!


What fun it is to envision something and make it come to life!


